Monday, December 27, 2010

$6 Chandelier

I have mentioned previously that I am an avid visitor of my local thrift store, the DI. I found a true gem a few weeks ago and seriously couldn't believe my luck. This massive chandelier was just waiting there patiently for me to find her, and her price tag? $6. Yeperoo.
I wasn't ecstatic about the charcoal gray color, and intended to spray paint it to better match our homes' rustic bronze lights. Once inside however, it was near impossible to tell that the color wasn't exactly the same as our other lights.

I had the perfect spot for the light, above the stairwell that is right off of our entryway. The existing light that came standard with our home was one of the "boob" lights, you know the kind.
It was so boring and provided hardly any light. The light had been installed really close to the corner, so it wouldn't have worked for us to install such a wide chandelier in that same spot. Also, I wanted it to be centered in our front window so that it could be seen from outside. My sweets was kind enough (after a bit of teeth pulling) to take on this project for me since I'm not brave or knowledgeable enough in the electrical field to take on an endeavor this big (yet). He and his pal got to work for the next few hours to give me this:

I LOVE the way that it turned out. We bought a little $2 swag chandelier hook from Home Depot and screwed that into the beam that fortunately ran right where I needed it to for the light to be centered in the window. The boys installed the wiring and plate where the original light was, and swooped the chain over to the hook they had installed. With (9) lights in this chandelier, it definitely provides light! I feel like the whole house illuminates whenever we turn it on. I am so happy with the way it turned out but may spice it up even more by adding some little shades. What do you think?


Total cost of this project: Chandelier $6, new light bulbs $10, chandelier hook $2; Total cost $18
Not too shabby if I do say so myself. I love being thrifty :)

Wednesday, December 22, 2010

Christmas Baking- Final Day 5

How is your Christmas baking going? Today is the final day for my Christmas baking post. I had to go out with a classic, Butter Toffee. My mom's traditional recipe uses pecans. I made a batch of this, but also experimented on a second batch with smoked almonds and some dark chocolate instead of milk chocolate. I am loving the saltiness of the smoked almonds in everything right now. You can choose which option tickles your fancy more but I am certain that you will be happy with either one in the end. :)

Butter Toffee

Ingredients:
1 LB butter (yes- 1 full pound. Don't worry the calories don't count when you boil it)
6 TBS hot water
2 cups sugar
2 TBS light corn syrup
1/4 tsp salt
1 1/2 cups chopped nuts (either pecans or smoked almonds)
12 oz package chocolate chips (I used milk for one batch and 1/2 dark, 1/2 semi-sweet for another batch)


Line a cookie sheet with half of the chopped nuts.

In heavy pan combine butter, water, sugar, corn syrup, salt and butter. I would not suggest using a nice non-stick pan. I use a big old heavy pan for candy. Cook over medium to medium high heat on stove, stirring occasionally till butter has melted. Using a candy thermometer, cook until temperature reaches the soft crack stage, approximately 275 degrees. The candy should turn to a golden color, and you should barely begin to smell a slight "burnt" smell but not so much that it actually is burning. You'll know when it gets to that point.

Not quite there yet but starting to turn golden

Remove from heat, and pour mixture over the chopped nuts.

While the candy is still hot, sprinkle the chocolate chips over the top.

Wait for about 5 minutes for the chocolate to melt, then spread the chocolate with a spatula. Top with remaining nuts.

Refrigerate until completely cooled, approximately 30 min. Break into pieces with a butter knife.

Enjoy!

Tuesday, December 21, 2010

Christmas Baking- Day 4

Snow Ball Cookies

Okay, these are really called Sand Ball Cookies but for the holidays let's call them snow ball cookies; deal? This happens to be one of my very favorite cookie recipes. They are a bit more time consuming than others because of the double rolling (read on my friends) but they're worth the extra few minutes.

I am so sad- I can only find some of the pictures of these cookies towards the end of the baking, so please forgive the absence of the ingredient pic and the pre-oven photos.


Ingredients:

1 cup butter

1/2 cup powdered sugar

2 1/4 cups flour

1/4 tsp salt

2 TBS honey

1 tsp vanilla

3/4 cup chopped pecans
Additional bowl of powdered sugar to double roll your cookies in

*** Note- I double this recipe almost always, but if you are only serving a small crowd you can stick to these amounts***


Preheat oven to 375. Cream butter and sugar until creamy in your Bosch or mixer. Add honey and vanilla. Blend in flour and salt slowly until mixed well. Add chopped nuts. Roll dough into small balls. Travis suggests licking the spatula while momma is rolling away. Bake on ungreased cookie sheet at 375 for 13-16 minutes.
Be sure to watch them closely around 14 minutes. My oven only required about 13 minutes. At 15 minutes this batch was overcooked. You want them to be starting to turn golden, but not as bronze as these little guys.

While the cookies are still hot, roll them individually in a bowl of powdered sugar. Allow them to cool, and then roll them in powdered sugar again till they are beautiful and white.
These could also be known as the vanishing snowball cookies, hence the photo. At least we have my cute Trav to make up for the horrible cookie pictures.


Enjoy!

Monday, December 20, 2010

Christmas Baking- Day 3


Penny Wenny's Original Peppermint Pretzel Bark
Now I don't meant to toot my own horn, but I think I created a little piece of heaven today. Seriously. My mom and sister inspired me with the idea without even knowing it. We all went and saw Tron the other night (courtesy of my generous big brother) and my sister Amanda passed around some of her yummy homemade Christmas candies for us to chomp on during the action. One bag had butter toffee (recipe from PW coming soon), another had both chocolate pretzel bark, and white chocolate peppermint bark. My mom commented to my sister after the flick that her bark had broken so she just held the two pieces together as she ate. We kinda laughed at her because they weren't meant to go together; they were two different candies that just happened to be in the same bag. But here's the kicker- they are SO meant to go together! I did a little baking experiment today and my theory proved to be correct. The contrast of salty with peppermint, white chocolate with dark chocolate= recipe for success. I think these will become an annual tradition for us from here on out. They are super easy to make and look fabulous also. Disfruta!
Ingredients:
1 cup crushed pretzels (I used the mini twists)
(1) 12 oz bag semi sweet chocolate chips
1/2 bag Ghiradelli bittersweet 60% cacao chips
16 oz white chocolate (I was lucky enough to have some white chocolate from Switzerland so I mixed that with a bag of Ghiradelli's white chips)
1-3 TBSP milk as needed
(1) 6 oz package candy canes, crushed
Line a cookie sheet with waxed paper. Melt dark and semi-sweet chocolate in a glass bowl over a pan of very low simmering water.
Once smooth, mix in crushed pretzels.
Pour mixture over lined cookie sheet, and spread out with a spatula.
Refrigerate for 30 minutes or until completely hardened.
Melt white chocolate the same way as the dark chocolate, adding milk as needed to reach a smooth consistency. Stir in half the candy canes.

Pull chilled pretzel bark out and pour white chocolate mixture over the top. Using a spatula, quickly spread the mixture gently, not pushing too hard so that the dark chocolate doesn't mix in with the white. Sprinkle remaining candy canes over the top and refrigerate again until hard, approximately 30 min.


With a sharp knife, cut bark into pieces. Enjoy right away, or if you have the will power not to eat the whole batch, store in an airtight container in the refrigerator until you are ready to polish it off.


Saturday, December 18, 2010

Christmas Baking- Day 2

Ready for some more sugar to add to your rush?

Giada's Smoked Almond Turtles
This recipe is the perfect combination of flavors with the saltiness of the smoked almonds, sweetness of the caramel and rich intense flavor of the dark chocolate. I am in love with these turtles. I hope you enjoy them as much as I do.

Ingredients:
1 cup coarsely chopped smoked almonds
1/2 cup heavy cream
1 stick unsalted butter
1 1/2 cups light brown sugar
1 TBSP water
3/4 cup Ghiradelli bittersweet chocolate chips (60% cacao)

Spray (2) mini muffin tins with cooking spray, and distribute the almonds evenly amongst the cups. Set aside.
***I love to make these in the muffin tins, but I also like to make them in a more traditional turtle way. You can prepare the turtles the same way but on a wax paper lined cookie sheet instead. ***


In a heavy saucepan combine cream, butter, sugar and water. Stir over medium heat until the mixture is smooth. Bring the mixture to a boil and cook without stirring until the candy reaches 240 degrees (approx. 5-7 minutes).

Remove pot from the heat, allow to cool 30 seconds. Using a long handled metal soon, carefully spoon the caramel over the nuts.

DO NOT SCRAPE CARAMEL FROM THE BOTTOM OF THE PAN (I learned this lesson the hard way). Allow the caramel to harden at room temperature for 1 hour.

Melt the chocolate chips in a glass bowl over a saucepan of an inch or so of water on the lowest heat. Stir until all the chocolate is melted and smooth.


Spoon the chocolate over the caramel and refrigerate for 30 minutes. Use a thin spatula or butter knife to remove the turtles from the muffin tins. Let the turtles soften at room temperature, and ENJOY!


Coming soon- Sandball Cookies

Christmas Baking- Day 1

I have made lots of goodies over the past few weeks and wanted to share some with you before Christmas. I would love for you to send me your favorite treat and candy recipes that you make for Christmas. ENJOY!

Mom's Cinnamon Rolls

Ingredients:
4 1/2 tsp. yeast dissolved in
2 1/2 cups lukewarm water
1 cube melted butter
2/3 sugar
1 tsp salt
1/2 cup canned evaporated milk
1 beaten egg
approximately 7 cups flour
1 cube butter softened to room temperature
cinnamon sugar

Mix butter, sugar, salt, milk and egg together in bosch or mixer. Add yeast mixture and stir. Slowly add flour till dough is soft. The dough should have enough flour that it starts to pull away from the sides of the mixer, but not completely (like bread dough).
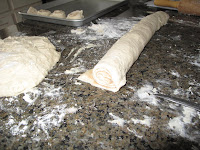
Put dough in large bowl, brush the top with butter and let it rise till double. Divide dough into two pieces, and roll each one out on a floured surface into a large rectangle. Spread softened butter over the top, and sprinkle generously with cinnamon sugar.
Roll the dough into a long loaf. Slice into 1/2- 1 inch pieces. Arrange on a cookie sheet and bake at 400 degrees for approximately 13-15 minutes until lightly golden.
While still hot, spread icing over the rolls.

Icing:
Mix together 2 cups powdered sugar, 2 TBS butter, and slowly add half and half to desired consistency.

Friday, December 17, 2010

French Wingback Chair Reveal

Okay let's be honest here. The real title of this post should be Blood Sweat and Tears. That's right. This project was tough. I would love to say that it was a piece of cake and I whipped it out in a few days like some of the amazing reupholstery divas out there but that was so not the case for me. I have been working on this little bits at a time since July(ish). I got distracted of course with other projects in between but towards the end when I was really dedicating my free time to it, it still took a lot of time and a lot of work. Fortunately I found a phenomenal blog that gave the best tutorial for reupholstering. Amy at Design Intervention provided all the answers to the things I was stumped on through her tutorials. Check her tutorial out here if you are feeling brave enough to tackle your own reupholstery project.

I will post detailed pics and instructions of my own on how this baby came about at a later day. For now, I was just too excited to put up pictures since I literally just finished sewing the last corner of the seat cushion.


Let me quickly remind you what this cutie pie looked like when we first found him in our before/after shot:


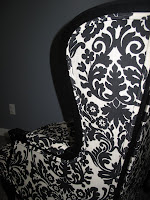
Now, she is far too beautiful to be a him, so here she is:


Please ignore the saggy seat cushion- the foam is worn and uneven so I plan on putting in a fresh and plump new piece soon which will fill that baby right back up. I am also making a little pillow out of the same fabric, but love the little bling pillow there for now. Also, the ottoman will be coming soon. I was too antsy to see the finished product so I sort of abandoned the ottoman once the fabric was stripped. She's still naked in my basement but I promise it will get done!

My goal was to have this little baby done before Christmas. I'm feeling pretty spoiled to have her. Merry Christmas to me!

I'm linking up to:
Furniture Feature Fridays

Thursday, December 9, 2010

Wreath complete!


I decided that with my lack of time before Christmas, I better just hang the wreath as is and wait till next year to do the trio. I bought a $3 spool of polka dot ribbon (I love love love polka dots... must be the little girl inside of me) and hung this little babe on our door. I love the cream against the black. I would love to see other cute and unique (and cheap please) wreath ideas. Send 'em my way ladies! (and gents if there are any)

Also, I had a great time with my neighbor gals last night at our cookie exchange. I made my Momma's famous sand ball cookies (aka wedding cookies). Recipe and pics to come shortly.

Off to teaching I go!

Tuesday, December 7, 2010

Pork 'n Beans

No no, this post is not a recipe for pork 'n beans. It's about pork, AND beans. Lima beans that is. And don't worry, no Lima beans went into the pork recipe.


I made a delicious and super easy dinner last night. BBQ Boneless Pork Ribs in the slow cooker. With a few extra ingredients added to the BBQ Sauce, these babies were scrumptious and full of flavor.


Boneless BBQ Pork Ribs

4 large boneless pork ribs
Salt and Pepper for Seasoning
1/2 bottle original flavor BBQ sauce
1 medium yellow onion, sliced into 1/4" rings
1 Tbsp chopped garlic
1 can diced green chilies


Lay ribs out on a foil lined cookie sheet. Season well with salt and pepper. Bake at 400 for 15 minutes, turn over and bake an additional 15 minutes on the other side.


Place ribs in crock pot with all remaining ingredients.


Cook on low for 6 hours. Some slow cookers cook faster than others, so check your pot after 4 hours to make sure that the sauce hasn't all dried out.

We served our ribs over salted baked potatoes. Yum-O!


Now for the Lima Beans. I have been wanting to make my Lima Bean Wreath that I saw on All Things Thrifty for months now, and finally made myself stop everything and do it yesterday. Aside from a few glue gun burns it was easy and painless. You can view the full tutorial HERE.


I need to pick up some cute Christmas ribbon tomorrow, and put this baby out. I have an idea for a trio but not sure if I have the time this week so it may just have to fly solo until Penny Wenny has time for more gluing.


Can't wait for Christmas...


On a side note, my little Trav loves to hide inside drawers lately. What a goof! I sure love him.