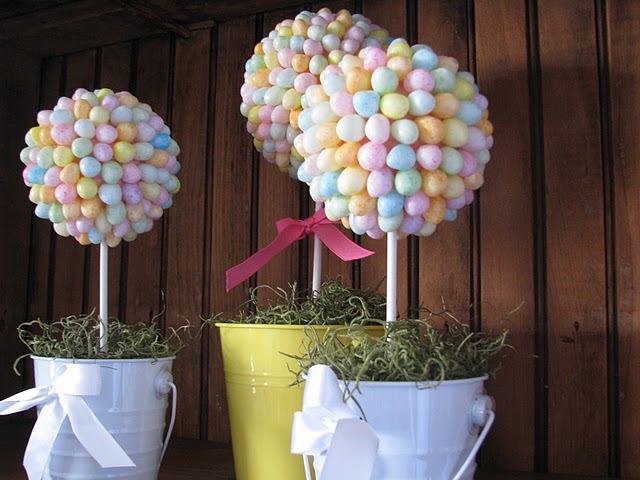
I must admit that while I absolutely admire (and envy) all of the creative peeps out there who decorate and craft for every holiday, I haven't really ever been one of them myself. I do love to decorate for Christmas and occasionally swap out my front door wreath and mat, but that is about the extent of the seasonal changes in our house. It's not because I don't like the holidays and different colors that come with each celebration, it's merely because I don't have the $ to spend to buy the decorations that I think are cute. So, when I saw these darling jelly bean topiary's from
Oodlekadoodleprimitive that I think are oh-so-cute for Easter and realized that they were so within my price range, I got right to work.
Here are the supplies I used for two topiary's:
- 1 long wooden dowel from Home Depot (approx $0.90)
- Stain or paint for wooden dowel (I used some of my leftover Minwax stain in Jacobean)
- 2 small containers, I purchased mine from All a Dollar (for $1 each...surprise) and sprayed them cream with some leftover Rustoleum paint in Heirloom white
- 2 foam balls ($3 each from WalMart)
- 1 square piece of foam, cut in half ($1 from All a Dollar)
- 1 small bag of Reindeer Moss ($1 from All a Dollar)
- 4 bags of Brachs Speckled Jelly Bean Eggs ($1 each from WalMart)
- A hot glue gun and 1.5 glue stick
- Decorative Springy Ribbon
- LOTS of patience while hot gluing
First, I glued the jelly beans directly onto my green foam ball. You can certainly paint your first but I was totally okay with bits of green showing through since green is a springy enough color for me :) This is the most tedious part, but hang in there and the end result is worth it. I found that if I pressed the jelly beans too hard into the ball that a layer of foam would pull off with the dried glue anytime I moved the ball, so the lighter the better for pressure!
Leave a small gap at the top (or bottom) of the ball for your wooden dowel.
Once your dowel has been stained (or painted) and cut down to size (preferably by your very own
sweets with the saw), insert the wooden dowel into a pre-made smaller hole that you create with a pen or pencil. (I did this simply because I had a flat end on my dowel and wasn't having much luck with a starting point to push through so the pencil created a guide for me).
I also added a dab of hot glue into the hole I created before inserting the dowel. The ball part of your topiary can be very top heavy, so do your best to center this as well as possible. I didn't do such a great job of this on my first one, which is why you will only see the second finished product from me :)
Since I was a bad girl and failed to take pics along the way of the bottom, please imagine great detailed pics to go along with these next (very difficult) instructions.
Cut the square foam in half (or to whatever size you need for your container) and set inside container so that it is either flush with the top or slightly lower than the top. Hot glue the reindeer moss on top to cover the exposed green foam.
Once the wooden dowel has dried in the ball, press the other end of the dowel in the center of the square foam (again in your pencil drilled hole with a dab of hot glue).
Add a cute springy bow, a few little "eggs" to the base of the topiary and display!
How cute and easy was that?
Please forgive the horrible pictures taken at midnight... more to come in better lighting :)
I'm feeling inspired to do even more spring and Easter decorations. I'll share some of my favorite ideas I've seen lately that have inspired me tomorrow.
Happy hot gluing to you all!
~PW