Showing posts with label decorating. Show all posts

Saturday, January 14, 2012

Ottoman revamp and a new light

Hello, friends.  I've been meaning to share with you for a while a few updates we made in our master bedroom, but the sad truth is that I've been to lazy to clean my room to photo-worthy standards so that I could actually share with you the updates.  Those first 12 weeks of pregnancy really stole all of my motivation.  I am pleased to say that I finally feel (sort of) like a real live human being again.  Definitely not my crazy-always-has-to-be-doing-something self, but at least alive.

Here's a recent shot of my master bedroom.


Observant eye balls will notice the new ottoman at the foot of our bed, and the new hanging light fixture.  Really observant eye balls will notice that I most certainly did not iron my bed skirt when I cleaned my room for the pics.  Crap.

I finished my wingback chair a while back, as one of my first ever reupholstery projects.  Here's how she looked then, with my scary blue walls in the bedroom.


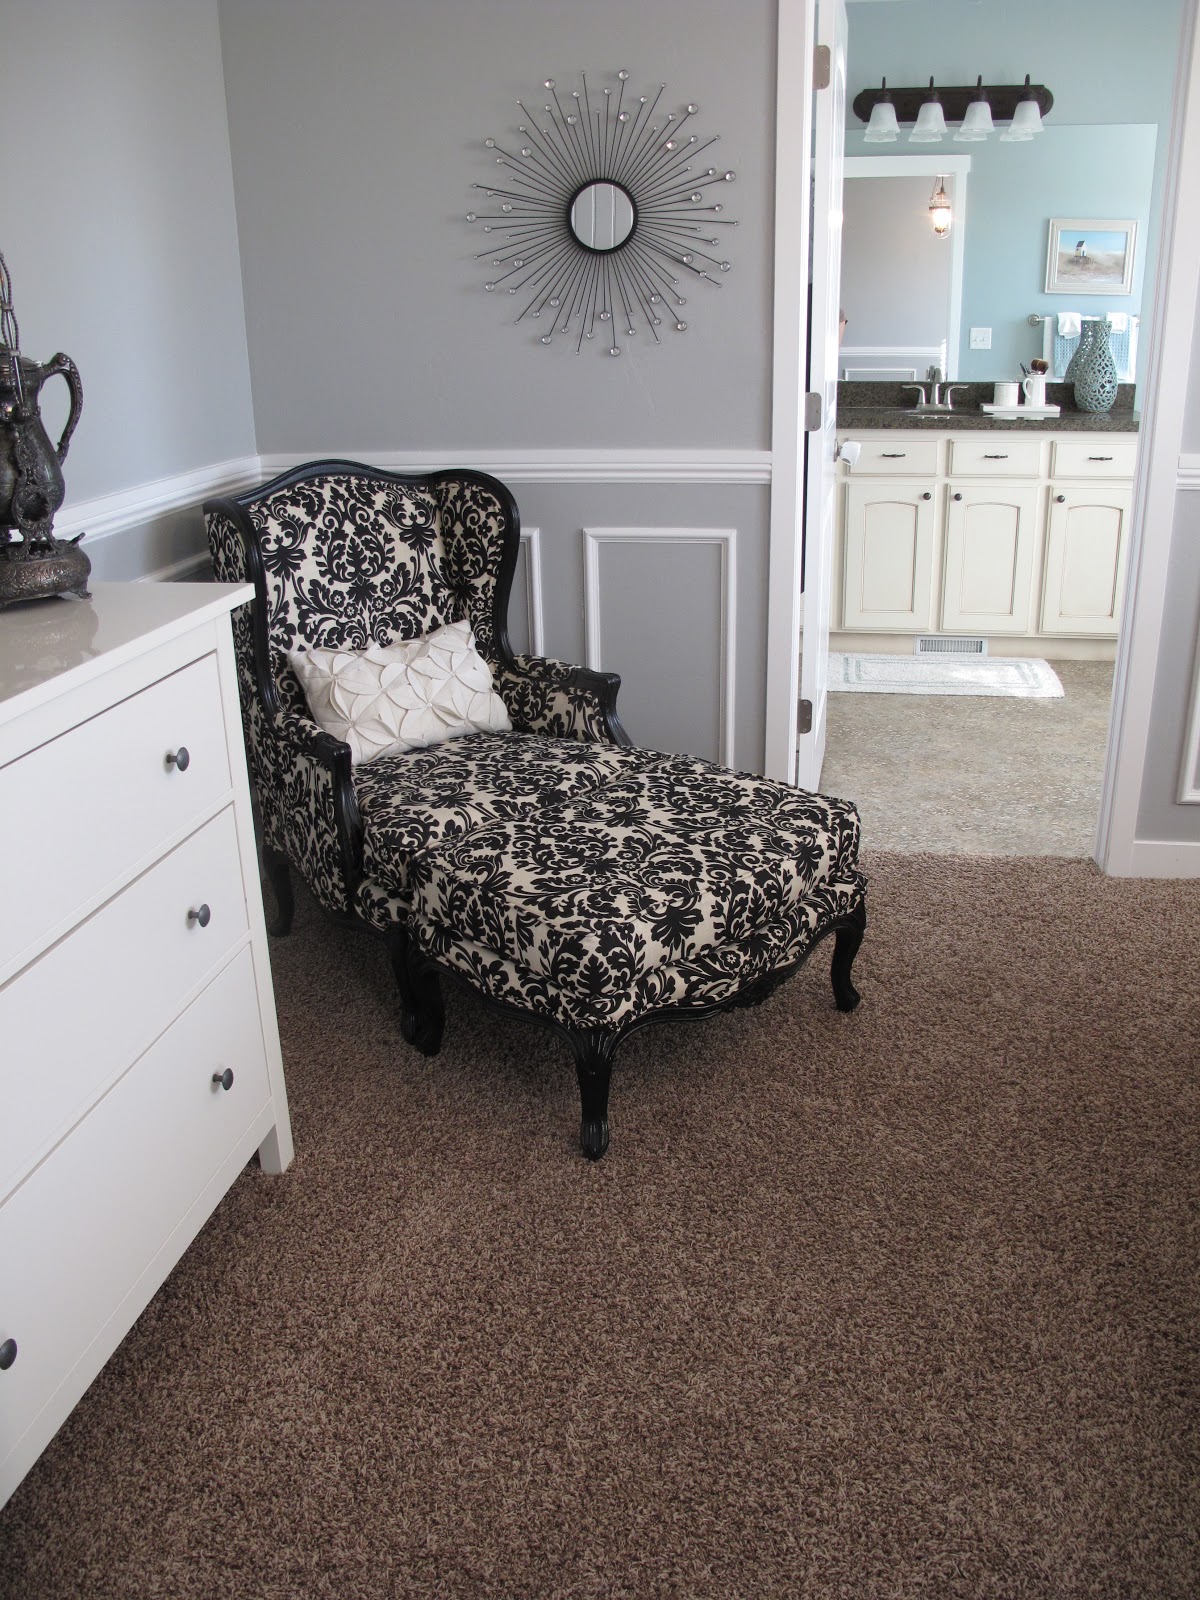
I didn't have the budget to replace the foam at that point, so it sat there with a saggy cushion for a long time.  I finally got the time, cash, and bravery to finish the seat cushion properly with new plump foam and a Dacron wrap and reupholster the ottoman.

Here's the much beefier seat cushion in my much calmer colored bedroom now.


It feels much better so sit on these days also.

Here's what the ottoman to this chair looked like when I originally picked it up at a thrift store.

Why didn't I just keep the original fabric?  It would have been so perfect in my bedroom... oh dear.

So here is that cute little ottoman now that I finally finished it, reunited again with its mate.


As you can see the ottoman slightly blocks the path to our bathroom, so unless I am reading or want to kick my feet up on the chair the ottoman resides here as a foot of bed bench.

I kinda like it.

Also, I found this steal of a deal at Home Depot on a lantern style hanging light fixture.  I saw one lurking out from behind another light with a clearance sticker, and had to take it with a price tag of $60.


Slowly but surely, the little additions to our bedroom are making it a complete space.  I still need to decide on my decor to fill this wall, but other than that it's almost done!

Any suggestions? 

~PW

Thursday, September 8, 2011

Curtain indecision

Friends, family, followers- I need your help.  I've been searching for fabric to make new curtains in my kitchen and living room.  I regret to tell you that I can't make a decision!  I really love bright and geometrical prints right now, but worry that I may regret going for a trendy pattern on curtains.  I'm starting to lean very much towards the blue and cream chevron print that I used on the Chevron Chair a while back.

It's got a funky print but the colors are more subdued.  The current price of $6/ yard is enticing also.  What do you think about creating super long curtains (ceiling height) for my kitchen?  The ones shown in the picture below were loaned by my Master Bedroom for the sake of this photo shoot... unfortunately they don't really reside here.  I do love the light and airy feeling that they provide, so I want to stick with a lighter color. 


Here's a full view of the kitchen currently so that you can envision it with the chevron.  I have also just purchased new bar stools to sit up to the island that I am planning on upholstering in a bright print to bring some color into the space and add a little personality.  


So, what do you think?  Here's the Chevron print again:


Here are a few of the prints I am considering for my bar stools:


This one is my absolute favorite but it's not available in outdoor canvas, and I really want to go that route for the bar stool fabric so that they will wipe off spills more easily.  Isn't this print to die for?  I can promise you that it will be used one way or another in my kitchen/ living room. 

I love this one also, but the pattern is very large so on bar stools I worry that you might not be able to see enough of the print.


Love, but it's not as bright as I think I want it to be for the pop of color and attention in the room.


Super fun, but is it too bright???

If I decide not to go with the Chevron print for curtains, one alternate is:


I also really love this print, but don't want the curtains to be this dark in the kitchen.


One last question to my dear friends.  Do you think the curtain print needs to be the same in the kitchen and living room if they are right near one another?

By the way, here's how my living room looked a few weeks ago when I shot the pictures of my dining room set.

That, my friends, is my "real" life.  I have sold almost all of the furniture I had in that room, and am so excited to start from scratch.  I'm hoping that my fabric choices will inspire the other decor!

I appreciate all of your input and suggestions.

Xo my friends, xo


~PW

Friday, May 27, 2011

Goodbye Paradise (and bugs)

Hello friends!  I must quickly report that my mini vacation to St. Lucia was amazing.  My mom and I stayed at the StoneField Estate Villa Resort in St. Lucia in our own private villa (which was more like a house with 3 bedrooms and a private pool).  My mom has a sweet gig where she gets to travel for virtually no cost, and happened to win this particular hotel stay.  I was lucky enough to be her plus one.  We laughed our heads off when we got there and discovered that the whole resort (and the island for the most part) catered to honeymooners, and that we definitely were not.

Despite the romantic setting, we still had a great time.  It was so nice to get away and try to force ourselves to just do nothing.  With these kind of views from our resort nestled between the world famous Pitons, it wasn't too difficult to do.


The only part about St. Lucia that was NOT so great was the bugs.  The villas are basically open to all critters with only louvres (similar looking to shutters) with screens on some of the windows.  The resort is literally right in the jungle so we were serenaded to sleep by our own personal sound machine of crickets and who knows what else.  I laughed my head off after the first night when my mom recounted the fact that the bug she thought she had flicked off her bed the night before was sitting on the pillow next to her when she woke up.  EEEK!  We are talking a big cockroach style bug... not a little house fly.

Of course I lucked out to find something very similar to this creature in my closet the next day. 
I wish I was in the right frame of mind at the time to take a picture but I was seriously just too terrified to think of anything but running away and getting that disgusting, huge, furry thing out!  A little gardener man was outside our villa and I asked him to help us, so he of course casually walks in, goes right up to the fist sized fur ball and picks him up with a black garbage bag the way you pick up your dog's poop!  We almost died!

Needless to say, we both took sleeping pills the next night to get some rest. 

I have to show you some pictures of another resort we toured, the Jalousie Beach Resort.  If I had all the money in the world, here is where I would stay.  The decor and architecture of the resort were to die for.  I had to stop and take pictures in one of the lounge areas that led up to their formal dining room.  I wish my entire house was decorated like this.

 This antique pewter framed mirror looked perfect against the modern white vases and aged table.
 Check out the black and white checkered marble tiles.  Need I say more?  They are also lined in the corners of the room with dark walnut wood floors.  Swoon.
 I fell in love with this bookcase/ armoire!  The wood had a natural weathered look with cream linen fabric lining the glass panes. 

They had hanging beds in the lounge with the most unbelievable views overlooking the ocean.  Loveee the caning on this bed and the chairs in the lounge.

In my next life I will be a billionaire who has a house that is decorated like the Jalousie Beach Hotel, and a view from my back yard that looks like this:

Until then, I will enjoy all the free trips I can get with my momma.  She is amazing (and not just because of the travel perks).  I love you, mom!

Wednesday, April 13, 2011

Creating your perfect place of rest with pillows

Before I present to you today's fabulous tutorial, I would love it if you would take a minute to enter the giveaway I am hosting this week from Ali Bug Bowtique for a chance to win some amazing hair accessories!


Although I posted about my Master Bedroom Makeover several months ago, I just barely completed all of my bedding this week.  I had a very hard time spending the hefty price tags for a 27" pillow form to go inside my Euro shams, and was delighted to wait for Fabric.com to stock back their inventory of  feather/ pillow forms for $20 each.  I also used my 15% off coupon and with free shipping, the decision was a no- brainer for me.  They arrived this week, and instantly the fabulous polka dot euro shams my mom and I sewed adorned my bed. 


I found a tutorial for these Euro Sham pillowcases on Prudent Baby via Craft Gossip because of how simple they looked to sew.  My mom and I are both pretty talented seamstresses in the sense that we can easily figure out a fairly difficult project, but because I was on a time crunch with the contest I was entering in, I needed something quick and simple.  I love prudent baby, but these were a pain in the caboose.  My mom and I worked on them together for about 3 hours one day when she was at my house, and then she offered to take them home to finish them for me.  She cursed me later for giving her this project.  The dimensions for the trim in the tutorial were way off, so we had to unpick the whole thing several times and cut new fabric.  Fortunately, I bought the upholstery fabric at a great price from Home Fabrics so it wasn't too big of a deal.  Anyway, she ended up making them work out fantastically in the end.  I will work on creating a tutorial for how we created those soon.  Despite the heartache they gave us, I am still so glad I chose to make my own because of the price tag, and uniqueness of them.  I love the playfulness of the polka dots in a very subdued color scheme making it more grown up.  The texture of the silk works fantastically next to the other bedding.


The standard shams I made were a cinch.  For the makeover, you saw the beginnings of my ruffled shams, sans ruffles due to my lack of time for the contest.

These were just fine, but I wanted something a bit more soft and feminine, and ruffles were just the ticket I needed.  Initially, I cut varying sized strips of fabric from my polka dot material and tried to ruffle the fabric using a fairly thick thread, but it ripped every time after tugging and tugging on the material trying to get it ruffle.  This particular upholstery fabric just wasn't going to budge for that.  Instead, I opted to simply stitch little pleats as I went along.  Here's how it went down.

First, I stitched a straight line all round each strip of fabric.  You will need to hem the edges under if you don't want any fraying, but I wanted mine to fray a little bit so I gave it plenty of space to do that while keeping it semi under control with a stitch to stop the fraying at a point.  I started with super long strips of fabric, in varying widths for my pillows.  Because you can simply tuck a new strip in under a pleat, you don't need to have this measured out perfectly in advance.


Next, I pinned my first strip at the top of the pillow case towards the outside edge, near the zipper and began stitching a straight line just a few stitches. 


With the needle down, I lifted the presser foot, and created a little pleat with the upcoming fabric.  I released the presser foot and stitched over the pleat.

I repeated this process, keeping the pleats as uniform as possible in their size and distance from one another.

Once my fabric ran out (if you don't create super long strips to start with), I simply tucked in a new piece by folding the top edge down, and sticking it under the presser foot to add right on.


You can't even tell it was added on.

Once I got to the bottom of the pillow case, I pulled the needle out and did a new stitch to finish the ruffled piece at the bottom, making it extend past the bottom of the pillow case just a bit.


I trimmed off the excess fabric to use for another strip, and repeated this process 5 more times.  I used different widths of fabric on my pillows and also changed up the spacing on the pleats.  I kept each pillow the same, but had different sizes and spacing between the strips themselves. 


Onto my bed they went!


I love the way that the fabric frayed just perfectly for that shabby look I love.


With a little pop of sunburst from my $24.99 Target pillow, this bed is just what the Dr. ordered!


Are you feeling inspired to create your own fabulous look with pillows, rather than the easy "bed in a bag" options you can find at the big stores?  Don't get me wrong, they can be fabulous but not nearly as unique as you are.  I know that I didn't make this whole experience sound easy peasy because the truth is that it wasn't.  I rarely get something perfectly the first go around.  I never want to leave the impression that creating your own masterpiece is without effort or a few mistakes.  To me though, the real beauty comes from the journey and the acquisition of knowledge along the way. 

On a far more serious note, I just inhaled a sleeve of frozen thin mints and barely frozen can of Diet Dr. Pepper for lunch.  Could life possibly get any better than that?  I don't think so my friends....


xoxoxo

~PW

I'll be sharing this little tid bit with these fine folks:


Tip Junkie handmade projects

The DIY Show Off


My Uncommon Slice of Suburbia

Photobucket


Domestically Speaking


Funky Junk's Saturday Nite Special


UndertheTableandDreaming


Transformation Thursday

Furniture Feature Fridays