Saturday, January 14, 2012

Ottoman revamp and a new light

Hello, friends.  I've been meaning to share with you for a while a few updates we made in our master bedroom, but the sad truth is that I've been to lazy to clean my room to photo-worthy standards so that I could actually share with you the updates.  Those first 12 weeks of pregnancy really stole all of my motivation.  I am pleased to say that I finally feel (sort of) like a real live human being again.  Definitely not my crazy-always-has-to-be-doing-something self, but at least alive.

Here's a recent shot of my master bedroom.


Observant eye balls will notice the new ottoman at the foot of our bed, and the new hanging light fixture.  Really observant eye balls will notice that I most certainly did not iron my bed skirt when I cleaned my room for the pics.  Crap.

I finished my wingback chair a while back, as one of my first ever reupholstery projects.  Here's how she looked then, with my scary blue walls in the bedroom.


I didn't have the budget to replace the foam at that point, so it sat there with a saggy cushion for a long time.  I finally got the time, cash, and bravery to finish the seat cushion properly with new plump foam and a Dacron wrap and reupholster the ottoman.

Here's the much beefier seat cushion in my much calmer colored bedroom now.


It feels much better so sit on these days also.

Here's what the ottoman to this chair looked like when I originally picked it up at a thrift store.

Why didn't I just keep the original fabric?  It would have been so perfect in my bedroom... oh dear.

So here is that cute little ottoman now that I finally finished it, reunited again with its mate.


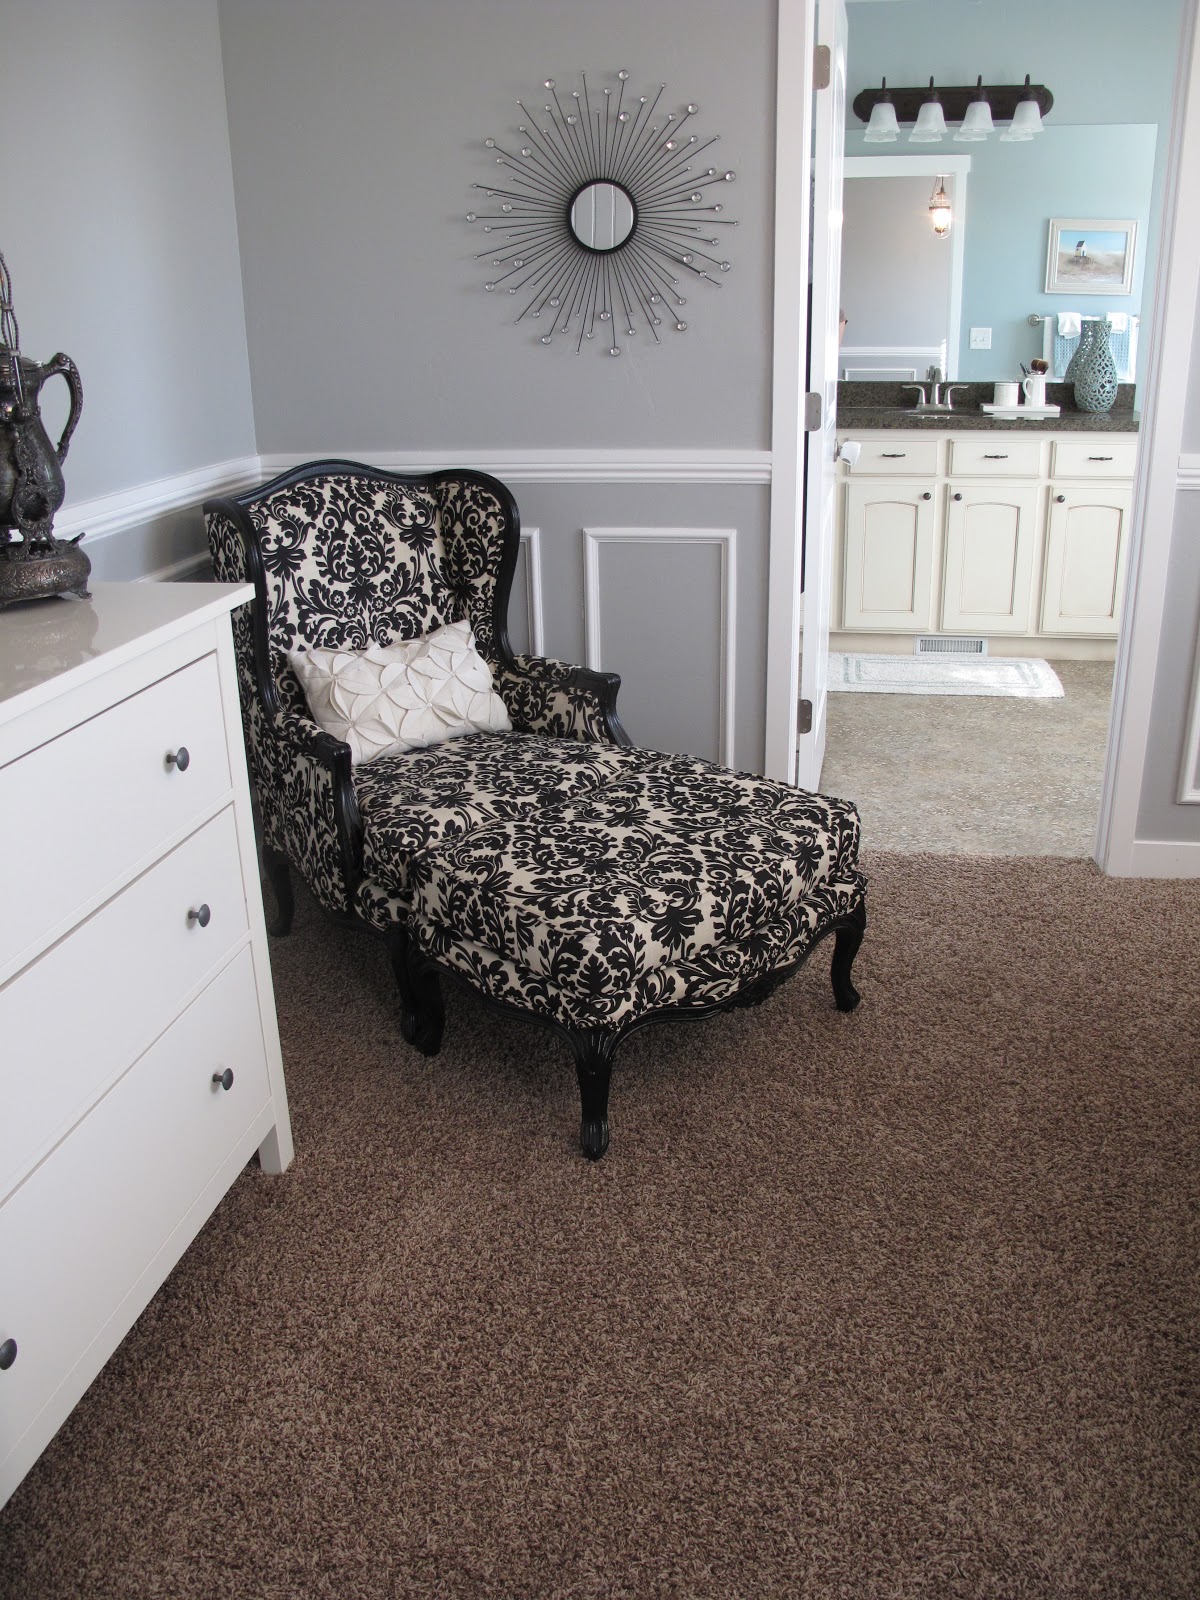
As you can see the ottoman slightly blocks the path to our bathroom, so unless I am reading or want to kick my feet up on the chair the ottoman resides here as a foot of bed bench.

I kinda like it.

Also, I found this steal of a deal at Home Depot on a lantern style hanging light fixture.  I saw one lurking out from behind another light with a clearance sticker, and had to take it with a price tag of $60.


Slowly but surely, the little additions to our bedroom are making it a complete space.  I still need to decide on my decor to fill this wall, but other than that it's almost done!

Any suggestions? 

~PW

Wednesday, January 11, 2012

Thrifty kicks

Most of my readers know that I love me a good bargain.  And by bargain I mean virtually free.  It's kind of a problem actually.  Anytime I consider a purchase, I usually find myself saying no because I could either make it myself, or buy it thrifted from someone who gave it away virtually brand new.  Does anyone have a cure for this???

I've mentioned before that the DI (Deseret Industries) by my house is a goldmine.  I have found some incredible steals there. 

This week, I stumbled upon three pair of shoes for a total of $11.

This sassy little set of Via Spiga pumps caught my eye and reeled me in with it's hefty price tag of $5. 

 I'm pretty sure these shoes have never been worn. The soles are untouched.

 I also scored on these darling little baby cowboy boots.  They are leather, and in amazing condition.

A whopping $3.  I'm saving these for Travis' little sister (please be a girl, please be a girl...)


Travis didn't go home empty handed either.  We found these leather cowboy boots in his size.


Once again, a whole $3 splurge.

He had fun running around in them playing cowboy with his best bud today.  Yes, we sometimes stay in our jammies all day.  Don't judge.

If you think you just don't have any luck when you thrift, think again.  I visit my DI on average at least once a week and I certainly don't find something every time.  I have a quick run in/ run out system down where I browse the furniture and shoes in about 5 minutes, and every once in a while I'll take the time to look through the kids clothing and home decor/plates/linens/ etc.

One of my favorite finds to this day is this pair of mustard brown leather boots that I walked out with for $6.

Are you ready to run out to your local DI/ thrift store?

~PW

Tuesday, January 10, 2012

Custom Media Center Inspiration

My poor husband gets the most difficult requests from me for gifts.  Most hubbies (other than my fellow DIY'ers) get requests like jewelery, shoes, clothes, even gift cards.  Unfortunately my sweets is not lucky enough to hear such requests.  This Christmas, my wish was to have him build me a custom media center for our TV, all other A/V stuff, storage for toys and blankets, and to decorate with and be the focal point of our fairly boring family room.  When we built our home 2 years ago we opted not to include a fireplace in the family room to cut back on costs, but I wish so badly we had done it.  When we build out our basement (hopefully in the next 2 years), we will definitely put one in.  For the upstairs though, I still want a beautiful center piece even if it doesn't get to include a fireplace.  SOOO that's what I asked for Christmas.  Oh, and crown moulding all around the kitchen and living room... minor details...  Being the incredible man that he is, instead of laughing at my request, he sighed, took a few seconds to respond (while he was likely trying to remember why on earth he married me in the first place) and said "show me what it needs to look like".  Man, I love that man.  :)

So after pinning my life away on pinterest, I found several different ideas for inspiration but nothing was quite exactly what I wanted... until I saw this gorgeous piece from Ethan Allen:

Source

Suddenly I head the heavens open up and the angels sing, "Hallelujah!"  Okay, not really but that's how excited I was.  HOLY. COW.  It is beautiful.  So, we got drafting and plotting.  Here comes the best part.  I had to run into my mom's attic the next day for a costume and saw some cabinet pieces lurking out from behind some boxes.


She had these extra cabinets and door fronts wasting their lives away in her attic from an order they had placed where the color was done wrong. So, they had to re-do them but my parents had to keep the first set.  They had tried to sell them at a garage sale, but had no luck?!?! Needless to say I became her yard sale buyer and we get to use them as a part of our design.  They look just like the Ethan Allen one also.  So my friends, here's a rough sketch of what we're (as in my dear sweets along with my inspiring words of encouragement) building:

We recruited my talented bro-in law who does carpentry work to help us with this project, and it should be going underway soon.  I can't wait!!!

Pictures of the end result and hopefully a detailed tutorial of what we they did will be coming soon.  If I'm really lucky, I may have my Christmas gift finished before next Christmas.... :)

Have any of you done any built in/ entertainment units in your home?  Want to share some words of wisdom?  Anything you wish you would have included for storage? I hope I've covered all my bases here...

~PW

Sunday, January 8, 2012

Family Pictures and an Addition

We recently had out family pictures taken.  We haven't had any professional pictures taken as a family with the three of us, and I felt like we were overdue for some.  After a lot of searching and referrals we chose a photographer my sister recommended who was within our price range and had a great portfolio.  You can check her out HERE.

Before we took the pictures, I stumbled upon this great post from Beth at Home Stories A to Z for suggestions on how to prepare for family pictures.  She had some really great suggestions and it definitely helped to come prepared with a few props, poses, and backdrops.  Here are some of my favorite shots that our amazing photographer captured.

This little stinker is notorious for his scowling faces. I love that she captured it here.


His smiles are pretty darned cute too.


I was in desperate need of a good head shot for the blog, and my dance studio where I teach.  I was happy with how they turned out.


Unfortunately, the first day of our photo shoot was FREEZING cold outside, and little boys can only handle so much pretending to be happy and warm. 


Lucky for us Natallee offered to do another session with us a few weeks later at no extra cost so that we could try to capture a few more of the shots we really wanted.

Like this one with my two most favorite dudes on the planet,
this one with the love of my life,
and especially this one with us all.

For those of you patient readers who stuck it out to the end, we also wanted Natallee to help us share some exciting news with our friends and family...


We can't wait for baby #2 to join our family this July! 

~PW


Saturday, January 7, 2012

Frenchy sofa worth the drive

It's been a long day for me.  I have been searching on ksl for a French or Victorian sofa, but haven't been able to find one that was just what I wanted, and within the price range that I wanted to pay (I'm kind of a tightwad if you haven't already gathered that).  So, I was ecstatic when I finally found this baby the other night during my evening browse.

Here's the best part.  The owner intended to reupholster it, but decided that she was in over her head and changed her mind.  BUT not before she stripped the whole thing!  YES!  I can't tell you how much I dislike pulling a billion staples out and have yet to do it on a full 7' long sofa, so I was just tickled pink.  The only bad news was that she lived pretty far away from me....like 3 hours away.  Fortunately, her hubbs met me about half way so it was an hour and a half drive for me. 

Here are a few shots of her close up as soon as I got her home.


Little Trav loves it just the way it is!  He was pretty sad when I took it straight downstairs...

Here are a few inspiration pics I have found recently on pinterest that may aid in my final decision for this sofa's upcoming makeover:

Source
I love the cream linen, the nailhead trim, and the two large cushions.

Source
I am absolutely smitten with everything about this one... the creamy frame, the light gray fabric, the plump single cushion... ahhh beauty.

Source

I love the charcoal fabric, single plump cushion and original wood tone on the frame.

I have to be honest, this project isn't going to happen very soon because we're working on our custom built in unit for my living room right now as top priority, but I'm really excited that I finally have the bones to create a piece that we'll love.

Lastly, I want to thank Apartment Therapy for the feature this week on my Easy and Affordable DIY Table Transformation.  I was thrilled with the recognition, but kinda bummed that my shining moment was on a project that I'm not all that proud of.  It was certainly not my finest piece.  Also it's pretty amazing to me how rude some people can be.  Apparently they didn't ever watch Bambi as a child... Thumper wisely taught, "If you can't say nothin' nice, don't say nothin' at all".  Amen, Thumper.  Amen.

Thank you so much for your support and kind words.  I can't tell you how much they brighten my day.  I appreciate you all dearly.

XO

~Penny Wenny

Tuesday, January 3, 2012

Simple Banana Nut Bread

It's been a while since I've posted a recipe for you fine folks.  Here's a super easy and delicious one that Trav and I made the other night to get rid of the scary looking bananas I had taking up space in the freezer.  I know that sounds terribly appetizing, but they work great for banana bread.  Anytime you have bananas that are on the verge of going bad, put them in your freezer whole and save them for a rainy day when you just have to have some yummy banana bread.


Ingredients:
1/2 cup Crisco
1 cup white sugar
2 eggs
2 bananas
1/4 cup milk
1 tsp lemon juice
2 cups flour
1 1/2 tsp baking powder
1/2 tsp baking soda
1/4 tsp salt
1/2 chopped nuts (I use pecans)


Preheat your oven to 350.
Cream crisco and sugar. 


 Add eggs and beat well.  Take a second to kiss your sweet little helper.


 Mash up your bananas with a fork.


Add bananas to mixer along with milk and lemon juice and mix well.
 Add dry ingredients and mix well.


 Stir in chopped nuts.


 Pour into well greased loaf pan,

 and bake at 350 for approx 1 hour or until a toothpick comes out clean in the center.


Your bread will rise significantly while baking.


Allow the pan to cool for a few minutes, then gently lay pan on the side and ease the bread out to cool on a clean rag.  Slice up into thick pieces, and serve with butter or my favorite, cream cheese.

Nummmmmmmy. 


And TOTALLY fat free.  Yep...


Enjoy, my friends!  Thank you so much for your continued support.

XO

~Penny Wenny