Tuesday, March 29, 2011

Spring Fever

I don't know how the weather is where all of you fine folks reside, but this Utah weather is crazy and such a tease!  Just when things were starting to warm up outside, I saw the first little blossoms on our teensy weensy maple tree we planted last summer, and I was even pulling out Travis' shorts to wear when mother nature decided to bestow the gift of snow upon us.  Seriously?  Come on.  Though the cold weather is still here for us today, my spring fever is hotter than ever.  I could spend hours (and very possibly already have... don't tell my sweets) blog hopping through these amazing and creative spring decor ideas.  Since they've been completely occupying my time, I feel it is only fair that you do the same. :)  Here are some of my faves that I've seen as of lately.

Vivienne at The V Spot created this darling robin eggs from the plastic Easter eggs we see all over the place.
You can check out her fabulous tutorial HERE.

Suesan from Frou-Fru Gal made this to-die-for square wreath that I am seriously hoping she will just go ahead and fed-ex to me tonight (we are after all blog sisters with the same template background).

Check out how she made this in less than 45 minutes and for under $10 HERE.

Another DARLING front door spring decoration was made by Jenny at Blue Sky Confections.  I am in LOVE.
Check out how she made this HERE. 

Though I know I don't posses the talent, time, or vision to create spring scenes as beautiful as these, I can certainly dream:

Craftberry Bush
Craftberry Bush
The Shabby Nest

The Shabby Nest
So beautiful.  Are you decorating for spring?

Monday, March 28, 2011

Spring Jelly Bean Topiary

I must admit that while I absolutely admire (and envy) all of the creative peeps out there who decorate and craft for every holiday, I haven't really ever been one of them myself.  I do love to decorate for Christmas and occasionally swap out my front door wreath and mat, but that is about the extent of the seasonal changes in our house.  It's not because I don't like the holidays and different colors that come with each celebration, it's merely because I don't have the $ to spend to buy the decorations that I think are cute.  So, when I saw these darling jelly bean topiary's from Oodlekadoodleprimitive that I think are oh-so-cute for Easter and realized that they were so within my price range, I got right to work.

Source         

Here are the supplies I used for two topiary's:


  • 1 long wooden dowel from Home Depot (approx $0.90)
  • Stain or paint for wooden dowel (I used some of my leftover Minwax stain in Jacobean)
  • 2 small containers, I purchased mine from All a Dollar (for $1 each...surprise) and sprayed them cream with some leftover Rustoleum paint in Heirloom white
  • 2 foam balls ($3 each from WalMart)
  • 1 square piece of foam, cut in half ($1 from All a Dollar)
  • 1 small bag of Reindeer Moss ($1 from All a Dollar)
  • 4 bags of Brachs Speckled Jelly Bean Eggs ($1 each from WalMart)
  • A hot glue gun and 1.5 glue stick
  • Decorative Springy Ribbon
  • LOTS of patience while hot gluing
First, I glued the jelly beans directly onto my green foam ball.  You can certainly paint your first but I was totally okay with bits of green showing through since green is a springy enough color for me :)  This is the most tedious part, but hang in there and the end result is worth it.  I found that if I pressed the jelly beans too hard into the ball that a layer of foam would pull off with the dried glue anytime I moved the ball, so the lighter the better for pressure! 

Leave a small gap at the top (or bottom) of the ball for your wooden dowel.


Once your dowel has been stained (or painted) and cut down to size (preferably by your very own sweets with the saw), insert the wooden dowel into a pre-made smaller hole that you create with a pen or pencil. (I did this simply because I had a flat end on my dowel and wasn't having much luck with a starting point to push through so the pencil created a guide for me).

I also added a dab of hot glue into the hole I created before inserting the dowel.  The ball part of your topiary can be very top heavy, so do your best to center this as well as possible.  I didn't do such a great job of this on my first one, which is why you will only see the second finished product from me :)

Since I was a bad girl and failed to take pics along the way of the bottom, please imagine great detailed pics to go along with these next (very difficult) instructions.

Cut the square foam in half (or to whatever size you need for your container) and set inside container so that it is either flush with the top or slightly lower than the top.  Hot glue the reindeer moss on top to cover the exposed green foam. 

Once the wooden dowel has dried in the ball, press the other end of the dowel in the center of the square foam (again in your pencil drilled hole with a dab of hot glue). 

Add a cute springy bow, a few little "eggs" to the base of the topiary and display!

How cute and easy was that?  Please forgive the horrible pictures taken at midnight... more to come in better lighting :)

I'm feeling inspired to do even more spring and Easter decorations.  I'll share some of my favorite ideas I've seen lately that have inspired me tomorrow. 

Happy hot gluing to you all!

~PW

Wednesday, March 23, 2011

Tall Antique Dresser Part 3 and Reveal # 2

Oh man, what a title....

Remember this darling antique dresser I have been working on and revealed to you with one leg missing?
Well guess what, her leg is back and looking sexy as ever!


Don't believe me?  Here's a closer look.


I'll explain how we (which you of course know by now means my sweets) fixed this after I walk you through the last steps of the drawer repair and beautification.

If you missed Tall Antique Dresser Part 1 or 2, check them out to catch up on how we got to this point in the transformation from here:


After I waited for the inside of the drawers I painted to dry, I lined them with this simple but classy wallpaper I bought for a whopping $1.99 in the clearance section at Wallpaper Warehouse.  It's a huge roll and will last me for several more projects.  This particular roll however didn't have the paste  already on the back of the paper (which adheres it to your walls or in my case, drawers), so I simply used spray adhesive and attached each piece to the wood with that.
After measuring inside each drawer, I used my rotary cutter and mat to get perfectly straight edges and applied the wallpaper with a plastic putty knife to avoid any bubbles (a credit card would work also).  Here's how they drawers looked once the lining was complete.


Here's a close up of the pattern.  I wanted to find something with a bit more modern of a print like a chevron or trellis pattern but this one was priced right and I actually like how it brings out the brown distressed parts of the drawers and the dark top. Some people think that lining drawers that will just be covered with undies and clothes is silly but not me- I am such a sucker for liners.  I have been known to buy several articles of clothing just because I was in love with the lining (coats, pants, shoes, etc.)

One other repair issue that needed to be addressed were the stops.  Several of the bottom drawers were missing the original stops so they weren't closing in uniformity.  I searched for stops similar to the ones that were still in tact but didn't have any luck. 


My sweets came up with a great alternative for me, and glued some small pieces of mdf to the back inside of the dresser to the point where the drawer needed to stop.


Viola!  They all match and stop at the same point now.  Good thing he thinks outside of the box, because I was only thinking of solutions to stop it from the front like the original ones do.  Smart South African man...

And now to the leg. You know that this was a dilemma for us, and I asked for some suggestions in another post.  I got some great ideas and really appreciate those who gave some input.  The piece had already been repaired once before but wasn't holding up to my satisfaction.  They had repaired it by drilling into the base of the "dresser" where the top of the leg begins and also drilling into the top of the leg so that there was a hollow core in each section.  They inserted a long metal rod into the hollow space and kept the leg in place that way.  It was wobbly, the metal had bent and I just plain old didn't like it.  After several different attempts, we ended up basically just replacing the metal bar with a wooden dowel (very snugly fitted)and several rounds of wood glue.  According to my sweets the wood glue causes the wood inside to slightly expand, creating an even more snug fit.  Once the wood glue had completely dried, I was left with a gap between the two pieces where the leg had originally broken off.  I filled it with several rounds of wood filler and sanded it down as best as I could to the original shape once it had dried.

 I certainly didn't get it to be a perfect match, but it was close enough for me.  After a few coats of paint,
sanding and stain, she looks good as new (or old- depending on  how you want to look at it).

And that, ladies and gentlemen is a wrap!  I was so excited to finally take some full pictures of her today (staged a little bit differently) so that I can post it for sale.  I'm seriously considering holding onto it for a baby girl's nursery since I am optimistically hoping that my second child will be a girl.  :)  We'll see what happens.

Doesn't this chevron print look amazing on the dresser?  You're gonna die when you see the chair that's being upholstered with this as we speak.

Here she is all naked just waiting to be adorned with someones accessories.


Thanks for joining me with this ever so slow transformation.  I love the charm that comes with really old pieces but they certainly require more effort on the repair side.  Was it worth it?  Absolutely....

I'll be sharing this reveal and tutorial with these lovely folks:

Tip Junkie handmade projects


My Uncommon Slice of Suburbia

Photobucket


Domestically Speaking


Funky Junk's Saturday Nite Special


UndertheTableandDreaming


Transformation Thursday

Furniture Feature Fridays

Tuesday, March 22, 2011

Winner Winner Chicken Dinner

I typically try to inspire when I blog and this post is no exception. Bear with me here as I try to explain.  I WON A DARLING PAIR OF LUCHA SHOES!  We all see giveaways all the time in blog land but never seem to be the lucky winners or feel like our odds are so slim when we see the outrageous number of comments, right?  Well, I lucked out from my friend The Shoeologist, and was actually the random lucky winner for these awesome Lucha Shoes


I decided to go with the gray ones since you all know I have a slight obsession with it right now, hence the color choices for my recent Master Bedroom Makeover.


Back to my explanation- entering comments for giveaways really does pay off, eventually.  Did I mention that I have also been the lucky ducky recipient of a $25 gift card to the Pleated Poppy from my darling friend Sarah's blog, For the Love of Blog Therapy?

I sure was.  The saddest part is that I still haven't redeemed it!  I keep watching for this darling ruffled scarf to come back into inventory so that I can snag it up. 


The moral of this story is... keep trying for those giveaways!  Yours truly hopes to host her first once we hit 200 followers, so stick around and you just may be the winner winner chicken dinner.


Love you peeps,

~PW

Sunday, March 20, 2011

Fabulous eats of San Francisco

Happy end of weekend, everyone.  I had a fabulous weekend that I just can't resist sharing with you.  My sweet friend and employer Kathie asked me to be sure to send her pictures of all the fun things we did and great food we ate on our planned vacation to NYC this weekend so that she could live vicariously through me.  What a funny gal. I'm hoping to give each of you a mini vacation vicariously through ours as well. Unfortunately we didn't make it to NYC since we were travelling standby on my mom's flight benefits and it was a sold out flight (she works for the best airline, jetBlue) but we went with our next best option of San Francisco for a fabulous quick getaway filled with lots of shopping, and scouring for great food. 

My dad has teased my mom and I accusing us of having 90% of our conversations or planned events revolve around food.  I laughed at first, but realized pretty quickly that we really do operate like that.  The truth is, I wouldn't have it any other way.  I absolutely love good food.   In fact, my dream job would be to travel the world and try out restaurants to review for travel books.  Anyone wanna hire me for that?  I promise I won't object...

Since I always love to travel with a few great suggestions for restaurants before I go, I thought I'd share a few of our favorite places that we found this go around.

The first great restaurant we found (after an average but not mention worthy indian restaurant for lunch) was an Italian place called Umbria.  It was right by our hotel in the downtown district on 2nd Street.

We ordered the Rustica Pizza and liked it but were not blown away.  We did however score with the Pasta, "Fusilli con Pollo e Carciofi".  It was unbelievably flavorful and consisted of corckscrew pasta sauteed with diced chicken breast, fresh artichoke hearts, sun-dried tomato and fresh arugula in EVOO and white wine.  We spoke with the waitress about how the dish was prepared because really the flavor was so intense for the ingredients.  She said that they marinate the sun dried tomatoes in the white wine and EVOO first, then toss in the pasta and artichoke hearts.  The chicken is prepared with garlic and salt and pepper and added to the marinade.  It sounds so very basic but I can't even describe how flavorful this was.  I will definitely be trying to concoct this myself soon and will share the recipe if it's a success.  I think the marinating of the sun dried tomatoes is the secret.

Our next day was spent wandering around inside the Ferry Building.  We sort of stumbled upon it (trying to find a great clam chowder in a breadbowl place by the wharf) and spent hours inside sampling different foods from all of the cafes and restaurants inside.  This place is fabulous.  If you haven't been here before, you must GO.  We were able to get small tasters of everything we wanted so that we got to taste a huge variety of foods rather than filling up on just one menu item. 

Here are just a few of the amazing places we tried:

G.L. Alfieri Premium Nuts and Fruit

Oh. my. gosh.  They handed out a sample of their Almond brittle as we walked past and everyone of us was hooked instantly.  I am a toffee and candy freak so I certainly don't buy just any toffee.  This was hands down amongst the best I have ever had.  They also have a huge variety of fabulous almonds (we loved the butter toffee almonds) and pistachios.  I couldn't leave without the lemon chili flavored pistachio meats. 

Cowgirl Creamery

This one is for all you cheese lovers out there.  We're talking, walk into the store and the further in you go the more it smells like stinky feet kind of cheese lovers.  Oh yeah.  I personally love a good sharp cheese and am of course willing to try any and all cheese they want to freely sample to me :)  My sweets loves a good Gruyere so per the cheese connoisseur's suggestion, I brought him home some fabulous cheese called "challerhocker".

 It tastes divine and will be saved for a special dinner with filet mignon (coming soon with the 1/4 cow we just butchered ordered).

We loved their cheeses so much and ordered a plate of Roclette cheese over yukon gold potatoes and asparagus to share.  Our family has an annual tradition of eating rolette, so we had to try this one and were not disappointed.  Roclette is a Swiss cheese that is prepared on a roclette grill similar to fondue (i.e. you melt the roclette cheese and pour it over beef, veggies, bread, or even fresh fruit).  Your house will smell like a high school football team's locker room full of sweaty feet but the taste really doesn't match the smell.  Did that entice you to try it or what?

After our fabulous day at the Ferry Building, we had to do some more shopping, and ate dinner in the Mission District at a great little burger joint (ironically for their cobb salad and to-die-for sweet potato fries) so that we were near our final and ultimate food destination for the day...

Bi-Rite Creamery

This tiny hole in the wall ice cream shop is so worth a cab ride and even hour long wait if you have to.  Since it was pouring cats and dogs outside, we were able to get right in but I would seriously fly back there again just to go eat this ice cream.  They have outlandish flavors like "earl grey tea", "honey lavender", and "orange cardamom" yet somehow the flavors that seem so bizarre for ice cream just so work.

My two favorites were "salted caramel" which tastes just as it sounds though I also felt like it had almost a "burnt" flavor.  My other favorite was "brown sugar with ginger and caramel sauce".  I would never think of ginger in ice cream but oh my heavens.  It worked.  I literally had to savor every single bite and was so tempted to get more after my two scoops.  I kind of regret that I didn't actually.  Next time.


All in all, the trip revolved around great shopping, fabulous food and a few moments of relaxation for our mani/pedi.  Every mom deserves a break like this every now and again.

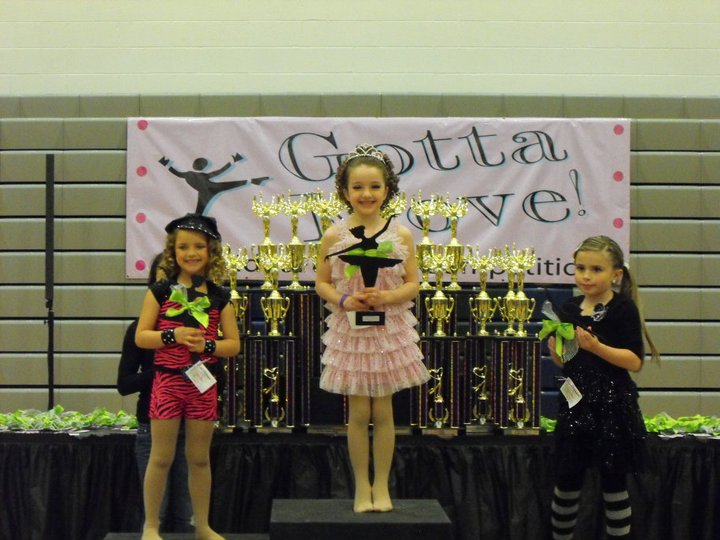
Also I need to brag quickly about one of my darling little dance students.  She performed the solo I choreographed for her in her first dance competition this weekend (which I sadly missed) and won Queen in her division.  I am so proud of her!


How was your weekend?

~PW