I think it's safe to say that these amazing Henredon Night Stands really completed my
Master Bedroom Makeover. I won't pretend that they were the easiest project for me. It took FOREVER to accomplish the look that I wanted. Fortunately for you fine folks, I tried about 5 different methods and through trial and error, finally got the exact look I wanted so that you don't have to figure it out the hard way. Keep in mind as you read through this tutorial that you may decide to eliminate (or add) some of the steps depending on what look you want. Best of luck to you!
I could kick myself for not taking a full "before" picture of the night stands when I purchased them. I saw them on KSL and was instantly in love with their legs, hardware, size, and amazing carved details. They came out of an upscale SLC hotel when they were renovating the rooms. I walked away with them for a mere $40 a pop. Talk about a deal. If you don't know the brand Henredon, go check out their
website and then let me know what you think about $40 a piece for these babies. When I picked them up, they looked like they were a cream with some gold-ish glaze. It wasn't till I got home and saw them in the daylight that I realized they were a very yellow cream with an almost greenish glaze. Ick.
This is the only picture I can find that sort of shows the whole piece (hiding under the pain cans)
Love the detail but hate the stain
So,
step one: I sanded.. Most often if a piece is in good condition without chipping paint, I will prime right away without sanding. In this case, there were several chunks of paint missing that would have left little pot holes. Also, I was curious to see what kind of wood was hiding underneath there in the event that I decided to stain instead. I used an electric sander on all flat surfaces without any details (the top, and drawer fronts). I used very fine sand paper and hand sanded all other areas that were rounded at all. I completely avoided the hand carved detailing. If sanding is necessary on ornate details, you can use steel wool.
Step two: I spray primed. Using Rustoleum Painter's touch gray primer, I sprayed these with several light coats until I had a good even coverage. Both stands only required about a can and a half.
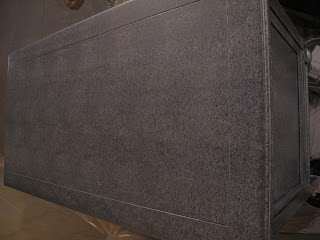
Step 3: I spray painted. Using Rustoleum Painter's touch spray paint in granite (satin finish), I sprayed several light coats once the primer had completely dried.
In between here and the next steps I made lots of boo boo's. Mistake # 1: I experimented with a different style similar to the one I did on the Thomasville dresser and HATED it on these stands. So lucky for me, I got to repeat steps 2 and 3 again to get back to where I started.
Step 4: I painted again- metallic rolling style.
Using Ralph Lauren's Regent Metallic Silver Base paint and Ralph Lauren's metallic finish roller, I rolled several coats onto the stands. This product is one that is intended for you to add your own color into it. Because my sweet friend had given me the rest of a can she used (and opted not to add a color), I decided to try it as-is also, thinking it would look really cool to still have the gray shine through as my base color.
NOTE: Ralph Lauren is being discontinued at Home Depot, so all of their paint products are on sale 50% off. Run in and stock up on their Regent Metallic before they bite the dust.
I originally applied it with a regular brush, and it looked awful (mistake # 2).
 |
| The center shows what it looked like brushed on... the edges were still the result from mistake# 1 |
Mistake # 3:Then I tried a regular roller, and it still looked awful. The roller kept pulling up the previous rolls.
After a stop at the Home Depot (and spilling the rest of the paint in my purse), I learned that RL makes a special roller for this particular application.
I thought it was just a gimmick to get you to by a stupid $7 roller but seriously, you have to have this to get the finish that the paint is intended to create. PAY THE $7. After several coats of rolling, the stands looked like this:
The finish was exactly what I wanted, but there was still too big of a contrast between the base coat and the brightness of the metallic finish.
Step 5: I sprayed- metallic style. Using Rustoleum Metallic spray paint in "Silver Metallic" color, I sprayed over the regent metallic finish with several light coats. FINALLY it was coming together. I loved the combination of these two finishes. The texture that the RL roller gave still shone through, but the spray paint helped to blend together the two different colors.
Step 6: Using Valspar's Antiquing glaze, I dry brushed lightly onto the stands until I had covered all areas, paying special attention to the nooks and crannies. Then, using a
completely dry paper towel, I rubbed the glaze into the paint, until it was dry and started to glaze into the "splotches" that the RL metallic finish had created.
 Please note that of course I learned this the hard way also through mistake # 4. I originally brushed it on thoroughly, and then wiped the glaze off with a damp rag. It left basically no glaze on the main surfaces, only in the cracks- not the look I wanted)
You can play with the glaze and add or remove as much as you want to. I have found Clorox wipes or a rag with windex to work well at removing excess glaze (not that I've ever had to do that, like a billion times. ahem.)
I opted to leave the center of my night stand unglazed, because I wanted it to look more like an actual mirror, and wanted to get it as shiny as I could.
Once everything else was all glazed, she looked like this:
Optional
Step 7: To make the top as shiny as possible, I sprayed her with several more coats of the Metallic Silver spray.
Step 8: I applied protective clear coats. I sprayed the top with Rustoleum Clear Gloss (hoping for the shiniest finish) and the rest of the stand was brushed on with Minwax Water based Polycrylic in semi- gloss. I would suggest using this same product in a spray can if you have to purchase it anyway; I just used what I had on hand but spraying is definitely more convenient. Be sure to spray your can upside down when finished to clear the nozzle so that you don't clog it up for the next time
(not that I have 4 cans with that problem right now or anything...) I applied 2 coats of clear finish, then sanded with a very fine sand paper to get rid of any bumps or brush marks.
I finished with a third and final coat of finish.
Step 9: I sprayed the hardware. Though I often love to keep original hardware as-is, my hardware looked a bit too dingy against the gorgeous silver. It still had some of that green-ness to it and was too bronze. I sprayed the hardware with several very light coats of Rustoleum Hammered spray paint in Dark Bronze color.
I put all the hardware back on, and VIOLA! Gorgeous Night Stands, finished exactly how I wanted them.
I must say I am in love. Hopefully your attempts will go much smoother than mine with my mistakes and successes. If you learned nothing else from this, know that I too make mistakes- lots of them. As Winston Churchill so wisely said, "
If at first you don't succeed, try try again". That I did, Winston.
I would like to give a special recognition to
Little Green Notebook and
Recaptured Charm for their inspiration and tutorials on how to achieve similar looks. Thanks ladies!
That's all for today folks.
~PW
I'm linking up to:


