Friday, May 13, 2011

How to Install Chair Rail Moulding

Hello friends,

Remember how I told you that I was lucky enough to do a guest post over at Perfectly Imperfect?  For those of you who didn't get a chance to view it there, here is my tutorial on how to install Chair Rail Moulding.  Enjoy!
Recently, I designed and completely re-vamped our Master Bedroom.  One of my favorite transformations in this room was the addition of our moulding.  In this post, I will share how to install your own.  This was my first experience with moulding, and I must admit that it was a lot simpler than I had anticipated.  Anyone can do this!

Here is a shot of the chair rail and picture frame moulding (also known as shadow boxes, or one of the many versions of wainscoting) that my sweets and I installed in our Master Bedroom Makeover.


Today I will share how we installed the chair rail.

It was pretty simp.
First, we measured: a) how high we wanted it, and b) how much we needed.

In determining the height we wanted, I did a lot of research and looked at a lot of pictures.  I learned that chair rail's initial purpose in history was to prevent walls from being scuffed by chairs (hence the name).  In those cases, the height of a person's chair determined the height of the moulding.  Nowadays, chair rail is typically installed anywhere from 32"- 40" from the floor.  Many go by the thirds rule- measure your ceiling, divide that number in thirds, and install your railing 1/3 of the way up.

On a more modern scale, many are installing their chair rail 2/3 of the way or higher up their walls.  I absolutely love this look also and think it is perfect for smaller spaces looking for a feeling of comfort, like a nursery or bathroom.

Source
Since I am a traditional gal, I installed my chair rail at the height of my French Wingback Chair in our bedroom, which in our case was 40" from the floor at the top of the rail.  We have 8' (or 96") tall ceilings, so ours did not follow the 1/3 rule exactly but we love the way it looks.


Once you determine the height, you need to b) measure the length.  I simply measured the length of each wall, less the width of doors and windows.  You have a few options here.  If you really want to keep the project cost as inexpensive as possible, you can simply take that total number of inches and calculate how many pieces of moulding you need by dividing your number of inches by 8, since moulding is typically purchased as 8' long pieces.  This will tell you how many pieces to buy.  Keep in mind though that you will have to use small pieces of your 8' sections in some places in order to use all of it up, which will result in a lot more labor on the caulking side, and a less seamless and perfect look.

In my opinion, it was so worth the extra $ to purchase a little bit more moulding overall to ensure that we could use as large of pieces as possible on each wall. 

Next, head off to your fave hardware/ paint store to pick up the goods.  I spent far too long than I needed to in Home Depot and Lowes trying to make my decision on what to buy.  The selection for actual "chair rail" was minimal in both stores (2 choices) so I decided to take a walk on the wild side and used something else.  I went with a casing (intended for doors) that had a different profile from the traditional chair rail.

Chair rail typically begins with the profile flush against the wall, curves out in a design, and then returns back to the wall at the bottom.

source
Since we have a Craftsman style home with very basic door casing and baseboards, I needed something a bit more boxy, while slowly introducing some curves.  Here is the best profile shot I could get of the Victorian casing I chose from Lowes.


Unlike traditional chair rail, this "chair rail" of ours has an extended profile at the top where it creates a little ledge.  The only con I see is that more dusting will be required, but I'm slightly OCD about cleaning anyway so that's not really a problem to me.  I love the way that it incorporates a boxy feel (at top) while introducing more classy looking curves at the bottom. 

So, we picked up our primed casing from Lowes and went home to get cutting.

First, my sweets and I took the measurement of our first wall (105") determining that we needed to use one of our 8' long pieces (96"), plus approx 9" of another piece.  With our Miter Saw, we (okay, he) placed the first piece of moulding on the saw table standing up with the flat end of the chair rail butted up against the back of the saw, and cut the right end of our first piece at a 45 degree angle, keeping the other (left) end uncut since it would meet up against our door frame. 

If you have never used a miter saw before, the task may seem daunting but it really is simple. If you plan on installing a lot of moulding in your home or using it as additions to furniture, cabinets, etc. I highly recommend investing in a miter saw.  They do sell small miter boxes for around $10 at hardware stores which in theory will allow you to make the same cuts, but you do the labor manually with a hand saw and will probably wish that you had invested in miter saw after your arm muscles start burning.  

The next piece of moulding was cut at a 45 degree angle also, but on the reverse side of the saw (by rotating the blade over to the opposite side). 

rotating the saw to the other side

ready for the opposite 45 degree cut
This piece would then fit snugly underneath the first cut. 


To finish this wall, we had one last 45 degree angle cut to make for the inside corner (the same as the first 45 degree cut).

Many prefer to cut all of their pieces before installing, but we liked to work wall at a time so that we could adjust the corner cuts accordingly to create a snug and perfect fit.

Here's how we installed the cut moulding. We applied a thin layer of liquid nails (a very strong wood glue) to the back of the moulding.

While one of us held the moulding up at the desired height and location on the wall, the other held up a level to make sure it was perfect. 
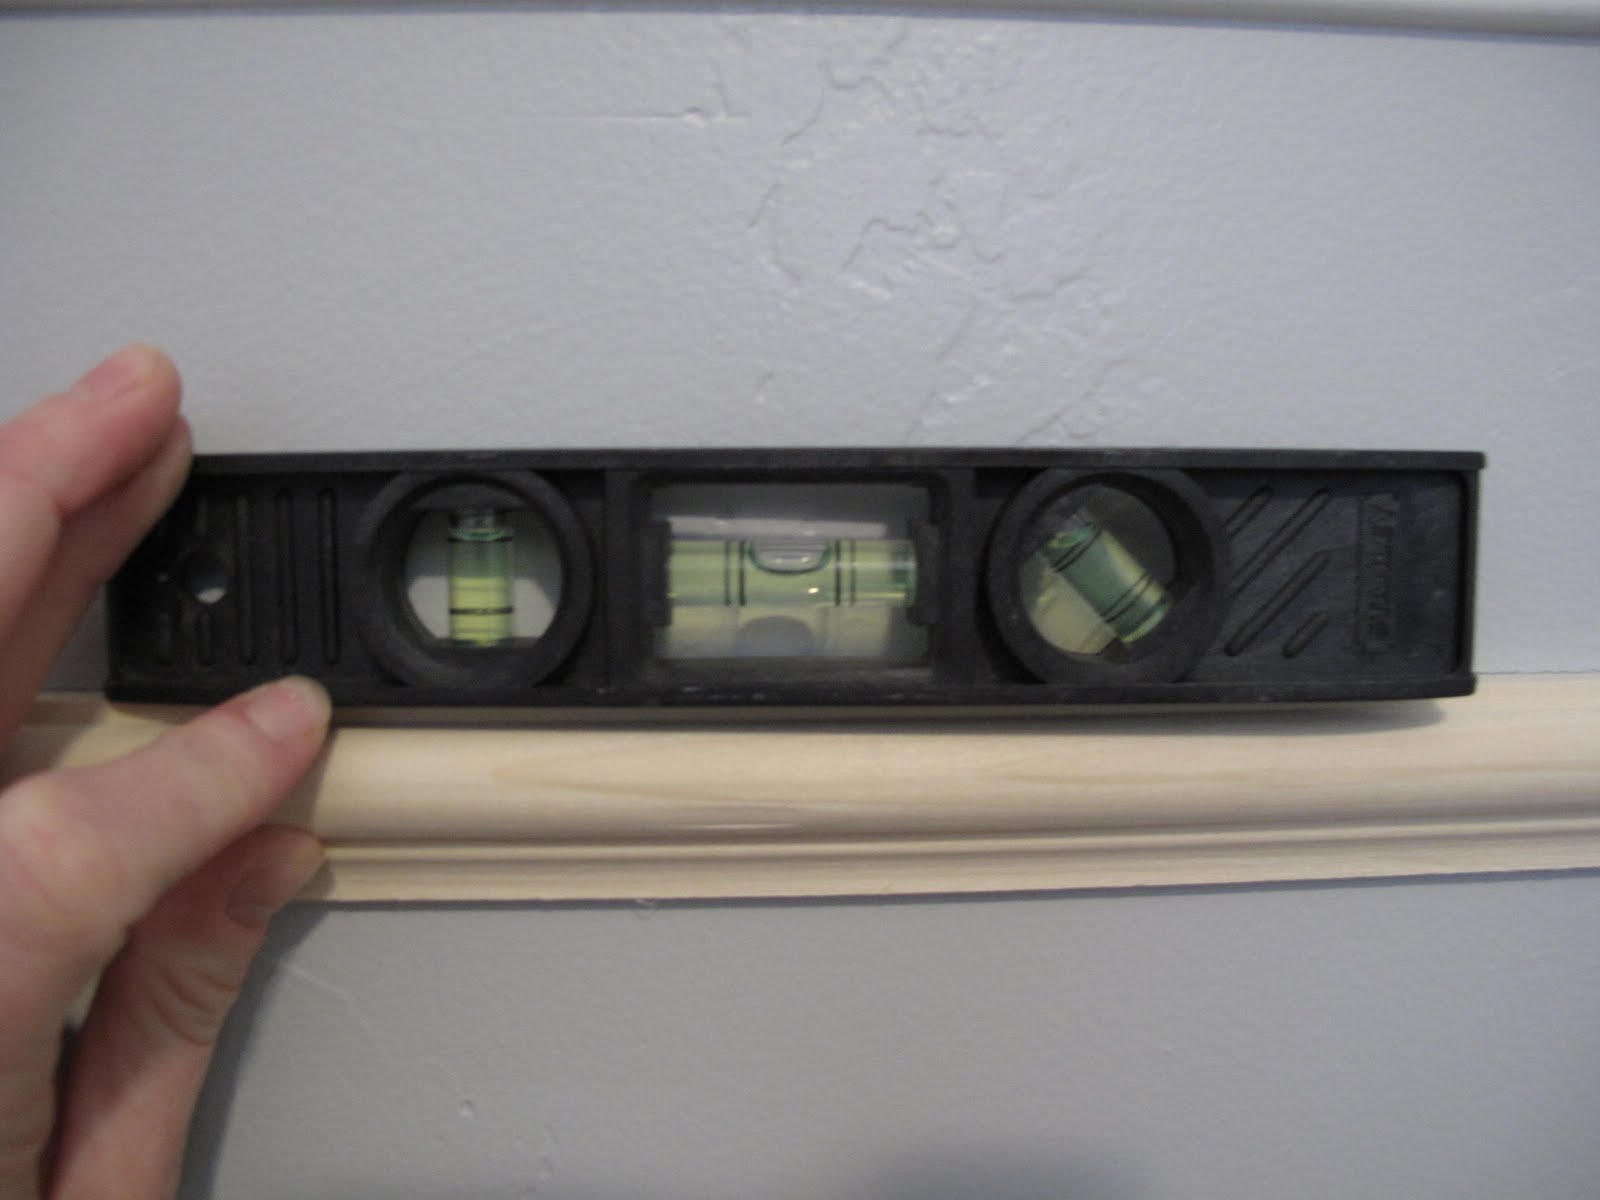
Using a pneumatic brad nailer we secured it in place first with as minimal nails as possible.  The simplest and most effective way to secure the chair rail in place is to nail directly into a stud (2 x 4). 

We used a stud finder to locate these while the other continued to hold the moulding in place and then nailed it into the stud. 

We also nailed on each end. Finally, our first wall looked like this:


We finished all of the other walls the same way (making straight 90 degree cuts around door frames and windows).

Next, we set the nails so that they were all shallower than the moulding itself.

shown on picture frame moulding below, but the same process was done on the chair rail

To finish the moulding, we filled all of the nail holes with spackle followed by a light sanding, and then caulked all of the edges and seams.  In all honesty, this process took longer than the entire installation (including measuring and cutting) of the moulding.  Perhaps the perfectionist in me caused it to take a bit longer than necessary...

Once dry, we finished off all of the moulding with two coats of high gloss white paint (after taping it all off of course).

picture frame boxes shown, done the same way for the chair rail
Finally, we were able to stop and admire our beautiful work!


Although I do love the simplicity of chair rail alone, I wanted something a bit more elegant for this space. 

Next, I will detail how we installed our picture frame moulding (also known as shadow box moulding or faux wainscoting).


Stay Tuned!
~ PW

I'm sharing this tutorial with these fabulous parties.  Check them out!

Funky Junk's Saturday Nite Special


Tip Junkie handmade projects

Boogieboard Cottage

Tuesday, May 10, 2011

Guest Post at Perfectly Imperfect

Hello fabulous readers,

I wanted to let you know that I am so very lucky to be guest posting over at the incredible Perfectly Imperfect Blog today.  Shaunna writes an amazing blog  about furniture restoration and vintage finds (to name a few) that will knock your socks off.  All of her pictures are eye candy worth drooling over.


Images Via Perfectly Imperfect Blog

I posted a tutorial on how we installed the chair rail in our Master Bedroom makeover.

Please hop on over for the tutorial, and stay a while to check out her amazing stuff.  I will also post the tutorial here in a few days, but want to refer the traffic her way first as a huge thank you for asking me to guest post.

Thanks so much folks!  I hope your day is wonderful and not spent re-stripping the entire dresser top you just stained the wrong color.... grrr.....

~ PW

Sunday, May 8, 2011

Tiny Hands and a Sneak Peak

Happy Mother's Day!

I had a fabulous and very relaxing day today with my amazing little family.  My sweets made breakfast for me and gave me some pretty tulips and a nice card.  My little Trav made this adorable thing in Nursery at church today.


It melted my heart.  I know that I have many years ahead of me with lots of little notes and crafts like this coming my way, but this was the first one I really got from him and it just warms my soul.  I love this little stinker so much and I need to remember that having messes in my house is okay!  I will work on enjoying the little finger prints while I have them..

How was your Mother's Day?  I hope you felt special and appreciated!

I wanted to also share with you a quick sneak peak of the AMAZING hardware that will be adorning my sister in law's dresser...

My heart skipped a beat when I first saw the pull.  I will share with you soon where they can be purchased.  Also, remember the paint I was stripping off the top the other day?

You will die when you see the beauty that was hiding underneath...

Thursday, May 5, 2011

Competition lyrical dance, "Hallelujah"

Remember that wild and crazy competition I told you about that my dancers and I attended over this past weekend?

Here's a video of them performing their lyrical piece, "Hallelujah" which took 1st place.  Yeah baby.


We're gearing up to compete at another one this Saturday.  The best part?  It's at a local theme park so we get to run around and play on the rides all day when we're done... yee-haw!

I love my job.

~PW

Wednesday, May 4, 2011

The perfect shade of the sea for a perfect dresser

Do you ever feel like you have 50 different projects going on at one time and you see very little progress since you are working slowly on each of them at a time?  Well I do! I don't have anything stellar to show you tonight since all of my projects are still a work in progress, but here is an update on one of my larger projects in progress as we speak.

My sister in law asked me to help her with her Master Bedroom Makeover a while back.  Her whole house is absolutely gorgeous, so I was very flattered that she even asked for my opinion.  She is steering away from her more Tuscan style bedroom that she currently has with dark (but gorgeous) wood furniture and deep green walls into something a bit more airy and light, with a French flare to it.  We spent quite some time searching for the perfect dresser to adorn her wall, and fortunately came across this cute thing on ksl (similar to Craigslist but more popular in utah). 


Her dresser is the cream one in the top right hand corner
 It was exactly the shape, size, and style she was waiting patiently for.  It was a shame that someone else had found it before she did and refinished it already, because it would just go in for another makeover once we got our hands on it. 

The bones of this piece are fantastic, but it wasn't the color or style she wanted with the current hardware.  She created the above collage of several different finishes/ styles that she liked.  Here are two of the faves that we narrowed it down to from Somerset Bay:

Source

Source
After she gave me her top 4 color picks from her Kwal Howell color deck, I decided to go fairly bold and picked out my fave- "Sea Drifter: by Kwal Howell.  I love to use Behr's ultra paint and primer in one in a satin finish (from Home Depot) so I had them color match it for me, and here is the gorgeous concoction that I came home with


After a light sanding over the drawers to remove the saw dust flecks and pieces of scotch tape that were left on the dresser before it was painted (geeeeeez people, come on) I painted two coats with a foam roller on the drawers.

drawers just as we received them


neglectful tape

After a fresh new coat

before and after
She just dropped off the actual dresser itself today, and I couldn't wait to get my hands on it.  Here's what she looks like.

 Could you just die???  These curves are SEXYYYYY!
 LOVE.

So, the original plan was to paint the whole thing.  Although I vowed to never again strip paint from an intricately carved surface after my horrific experience with my dining room table (which is one of the 50 above mentioned works in progress), I couldn't bare to leave the scuffed up and mistreated top the way we got it.  The hiding wood underneath is so gorgeous, and I think it will really create the look she will love, especially in her bedroom where she will be pairing some of her current dark wood furniture with some new light and airy pieces. 

I whipped out my sander to clean her up a bit and get rid of the top coat of polyurethane and glaze.


I very carefully sanded down all of the beveled surfaces as they are the hardest to remove paint from with a stripper.

Just before bed tonight, I slabbed her down with a thick coat of Citristip that I will allow to soak for about 12 hours before I start scraping tomorrow.


Hope you are as anxious as I am to see the finished product!  Wait till you see the new hardware she has picked out for her... hold on to your seats peeps.

xoxo

PW

Monday, May 2, 2011

Crazy Weekend of Chaos

Hello my friends!  I feel like it has been ages since I have been here.  I suppose a week isn't so long, but this week has felt like a month for me.  I'm sorry I haven't had a moment to post anything exciting with you (though I do have a lot of projects and tutorials in the works that simply need to be typed).


My dancers attended their first team competition this weekend and did so well!  We had a few rehearsals this week, along with my normally scheduled classes, and then headed out on Friday afternoon for the solo, duo, and trio competitions Friday evening.  For those of you who do the "competition scene", you can imagine where I was all weekend.  For those of you who haven't been through the torture fortunate enough to attend such events, picture the movie "Bring it on" times ten.  It's wild.  I love watching my darling girls perform and I love watching some of the really talented dancers and pieces of choreography that are showcased, but I don't love the crowds of people in every single crack of the building, the blaring speakers all day long, the stress and anxiety of waiting to perform, the crazed out tiara moms, and the 4 year old girls wearing sports bras and booty shorts doing hip thrust moves and calling it "dance".  Can you tell I needed to vent?


Friday nights events finally finished around midnight, we rushed to our hotel room to attempt to get some shut eye (mission- failed) and then hit the floor early again Saturday morning, finally leaving the venue at about 7 pm.  I was glad to finally be home at 10.

Most importantly, my dancers did SUCH A GREAT JOB! I am so proud of them for all of the dedication, commitment, perseverance and endurance they put in to showcase such great pieces.  They have come a long way and I am so proud of them!  I will post videos soon, but tonight just wanted to share some pictures with you.

My youngest soloist

Beautiful duo girls

Sassy little trio

darling soloist

another darling soloist

Excited about their trophies from Fri night

Team warming up for their first lyrical number
Waiting to walk on for their jazz piece

AMAZING stage makeup by Eye Kandy (taken about 6 hours after application and several performed dances)

Team waiting to hear the scores
What about you?  Did you survive your weekend?

I have some tutorials coming to you this week on how we installed our moulding in the Master Bedroom, and a third installment of the Re-upholstery series, so hang tight you patient peeps!

xoxo

~ Exhausted PW